Freshdesk tickets to Jira tasks
Use Case
Requirements
# | Freshdesk | Jira |
|---|---|---|
Connected Systems | ||
Authentication (supported methods) |
|
|
Permissions |
|
|
Environment |
|
|
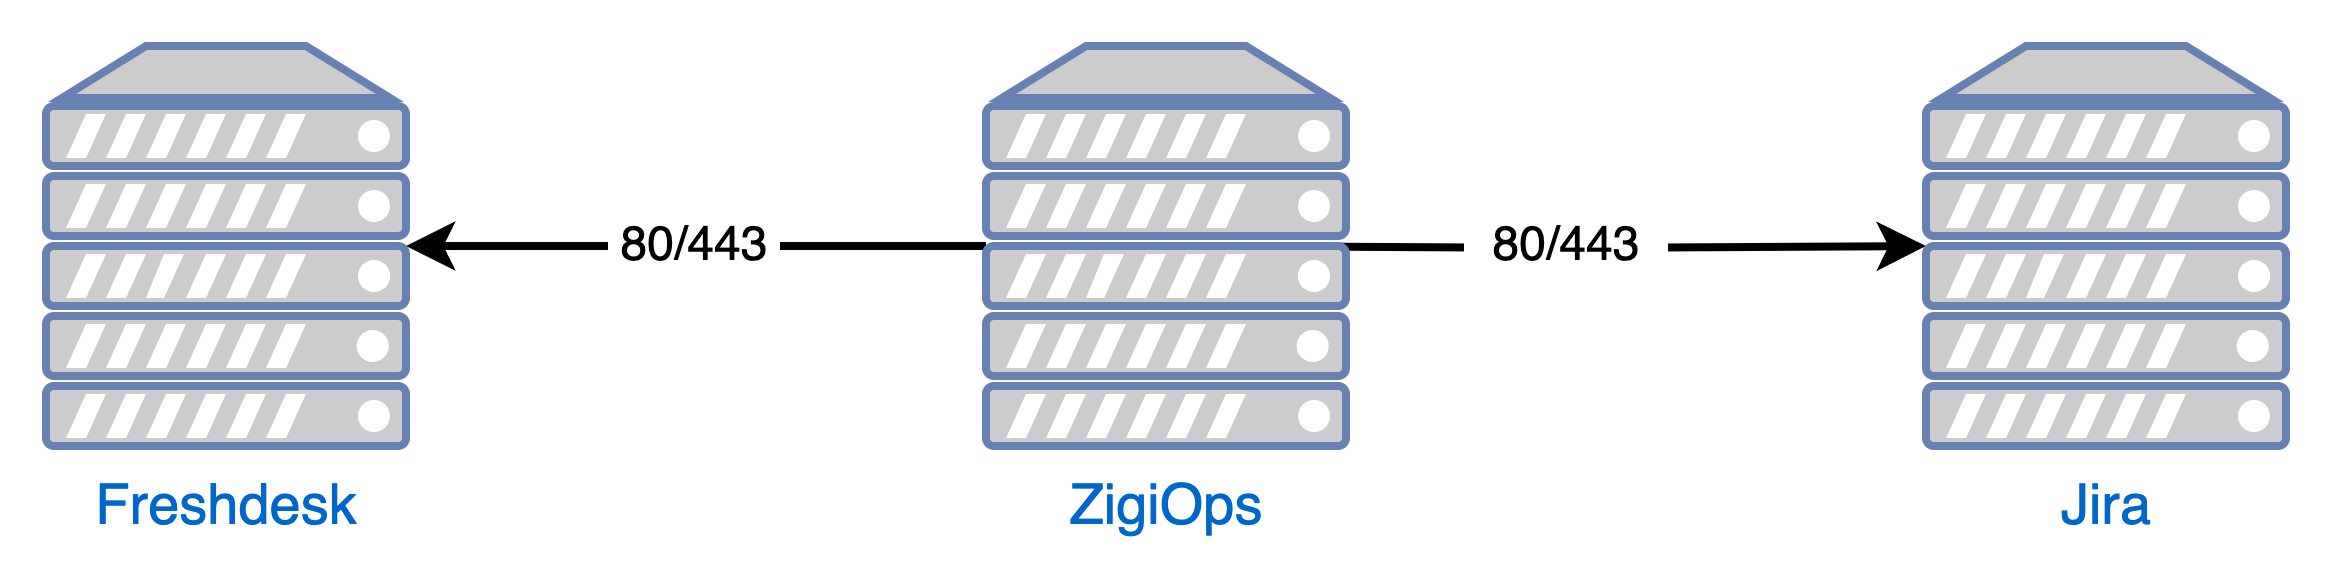
Network Requirements
Setup
Log in to your ZigiOps instance.
Go to ZigiOps → Configurator and load the integration template.
Select the desired Integrated Systems and Integrated Systems.
Update the correlation configuration by replacing the default Jira custom correlation field (
customfield_10041) with the custom correlation field you created earlier and click the Save button to continue.Enable the integration from the Slider button located in the middle section of the screen.
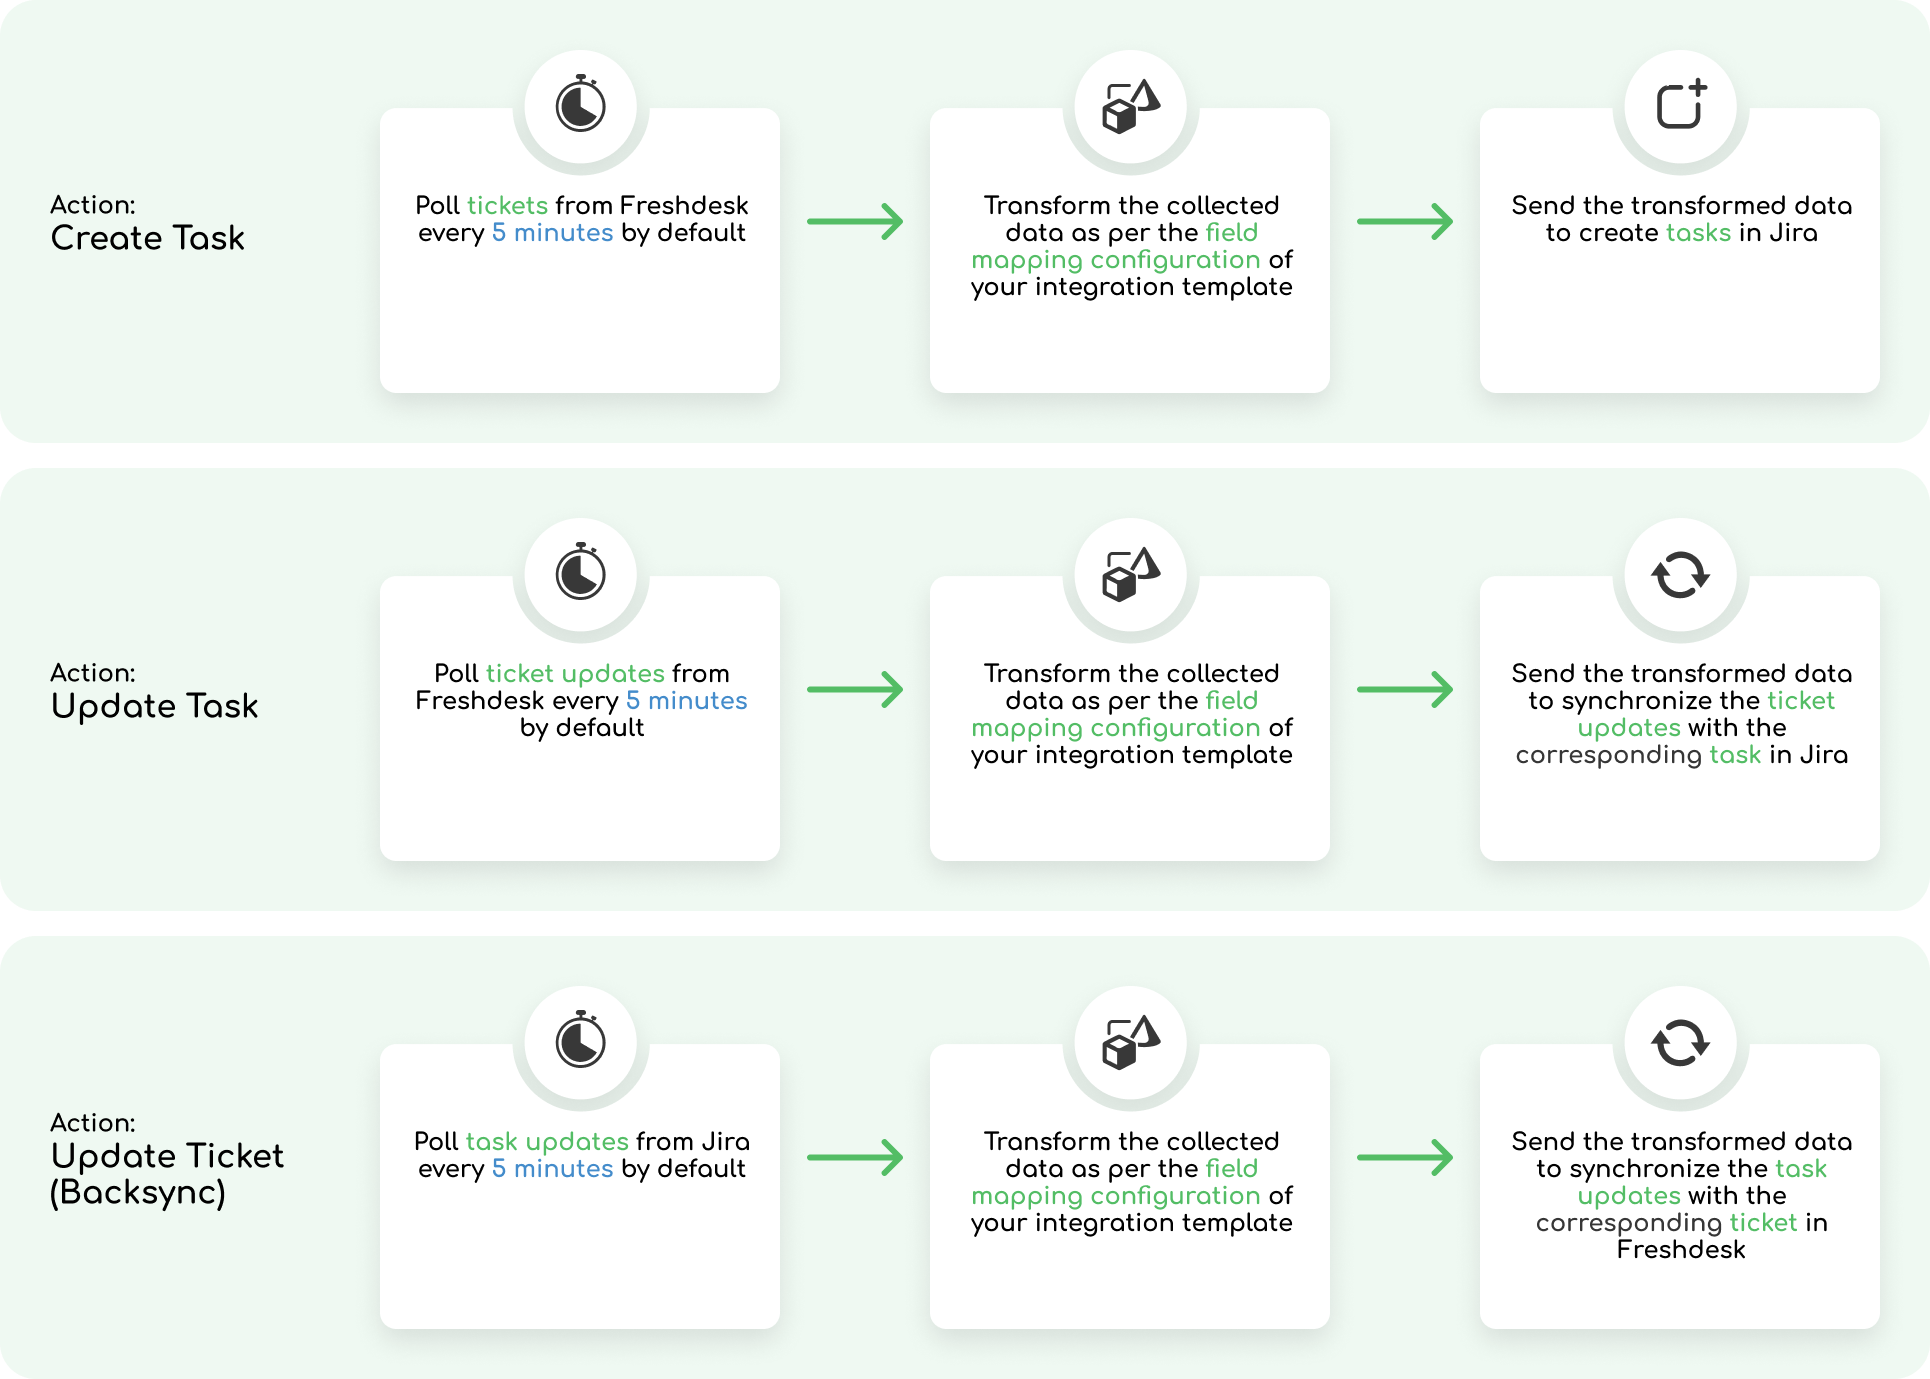
How does the Jira Freshdesk Integration work?
ZigiOps automatically collects Freshdesk’s tickets on pre-defined time intervals and transfers them to Jira as a new task. All necessary fields will be transformed and also moved to Jira (based on the defined mapping in ZigiOps).
When there is an update on the Freshdesk ticket, ZigiOps will pick it up and populate the corresponding Jira task with the necessary fields (comments, attachments, assignees, and more).
When the Jira task is closed or updated, ZigiOps will close or update (backsync) the corresponding Freshdesk ticket with the applicable information or close the task.
No specifics are available for this integration.